
Encouraged by the results of my previous post I went forth and ordered a Mac Mini (2.4GHz Intel Core 2 Duo, 4GB 1066MHz DDR3 SDRAM, 320GB Harddrive) along with the Apple remote, wireless keyboard and wireless Magic Trackpad to see how play back looks on my T.V. I figured having a computer hooked up to my TV there would be times when I might want to use it like a computer. Surfing the web from the couch or having a place where guests can check their e-mail just seemed like the smart thing to do.
The Mac Mini I ordered was a custom build. Chances are this will be overkill for 90% of you. I would say from my experience of doing a project like this you can get away with the base model of the Mac Mini and be just fine.
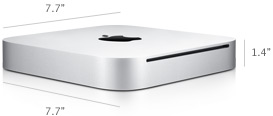 When the mac mini came I found setup to be quite easy. I Took the computer out of it’s box and placed it on the stand under my T.V. Hooked up the power cord, HDMI cable and pressed the power button on the back of the computer. On it’s first boot-up I was asked if I had a wireless keyboard and mouse/trackpad and to turn them on. A few more clicks through the initial setup and I was good to go. My Mac mini was running fine and everything looked great on my TV. I did have to go into the system preferences and make minor adjustments to the display settings for my TV, but that was it.
First thing was first. I had some software to download.
- Firefox – Free
- Adobe Flash – Free
- Handbrake – Free
- VLC – Free
COPY PROTECTION
 After downloading and installing the VLC and Handbrake programs I put in the first DVD I wanted to encode. Ironman 2. Like the test movies I did earlier in the month I put the Ironman 2 DVD in my mac mini, launched Handbrake and pointed it to the DVD so it could do it’s initial scan of the movie data.
The first time I did this with another DVD on my laptop the process just took about a minute. On my Mac Mini with Ironman 2 it took almost 2 hours to complete. Something was not right here. When the scan was completed I reviewed the handbrake encoding settings. It was in this process I noticed something was wrong. No audio tracks were listed. If I told handbrake to encode this it would encode the movie without the audio. I went to Google for help and started searching around to see if other people had this problem. Sure enough they did. Ironman 2 has new/different copy protection on it preventing me from encoding the movie I owned.
Remember that what I am doing is perfectly legal. This is my media I bought and paid for. I am just putting it all on a drive so I can access it more easily.
Thanks to some forum posts over at the Handbrake site I was able to use a program called ‘Mac The Knife‘ and copy the DVD to my hard drive and then encode it with handbrake. (At the time of this post I have been considering switching from ‘Mac The Knife’ to ‘Ripit‘ A $25.00 peace of software that appears capable of ripping more copy protected DVDs then the free ‘Mac The Knife’.) The end result was an encoding of the movie for my mac mini. Since then I have come across a few other disk with copy protection like this. Mostly TV Shows.
ENCODING SETTINGS
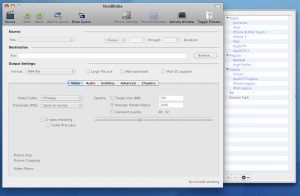
After watching the Ironman 2 movie and comparing it to the DVD I kept seeing what is call artifacts on the screen. The default Handbrake compression I was using was not the cleanest and it was driving me a little crazy. I headed on over to the Handbrake forums and did some reading. It turns out you can make slight adjustments to the settings and see a huge difference in video quality. It is now to the point that I can’t tell the difference between the DVD and the encoded video. Which is what I was hopping for.
When you launch Handbrake you are presented with a pop out pane on the right side that has a number of preset suggested compressions. If you click on the ‘Apple TV’ preset and then go back over to the main window you are only going to have to adjust two settings. The first on is under the “Output settings”. You want to uncheck the box called “Large File Size”. Next, lower on the same window you’ll see a slider bar. You want to drag that slider to the right till the RF reads 19. That’s it.
If you don’t want to have to go back and adjust those settings each time you put in a DVD to encode, you can click on the “Presets” drop down menu on the finder bar and save this setting as a new preset. As you can see below it is near impossible to see the difference between the DVD and the encoded video.
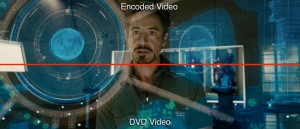

As I have been writing this post I have been encoding a lot of my DVDs. The encoding settings I have given you above will work for most of your DVDs as well, but not all of them. This is because most DVD are made using the NTSC standard. I do own DVDs that are made using the PAL (Phase Alternating Line) standard. When I try to encode a DVD that was made with the PAL standard the result is a movie that looks like it is shifting alternating lines. When you see it you will know what I mean.
To correct this problem and remove the “alternating lines” look of my encoded movies I once again visited the handbrake forums. The first steps are the same as above. Launch Handbrake and in the pop out pain on the right side that has a number of preset suggested compressions. If you click on the ‘Apple TV’ preset and then go back over to the main window you are only going to have to adjust two settings. The first on is under the “Output settings”. You want to uncheck the box called “Large File Size”. Next, lower on the same window you’ll see a slider bar. You want to drag that slider to the right till the RF reads 19. We are almost done. Click on the “Picture Settings” icon at the top of the program window. Switch over to “Filters” tab and click on the “Decomb” drop down menu and select “Default”. Every PAL movie and TV show I have encoded with this setting has looked great to me. Don’t forget to save this as a preset.
HOW TO ENCODE TV SHOW DVDs
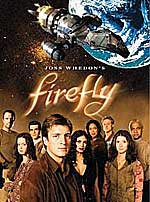 Handbreak is a great program, but you still need to help it along it’s way. This is very evident went you are encoding TV Shows. When you have Handbreak scan a TV DVD like Firefly, handbrake is going to pick one file it thinks is the video file you want to encode. Normally it’s the file with the longest video on it. However a TV show DVD like Firefly can have up to 4 episodes on one DVD. By default Handbrake is going to try and find the one video file that is the longest and only encode that one file. This is not what we want. So how do we fix this?
This is where I use VLC a lot. Start off by Scanning the DVD with Handbrake. Once that task is completed launch VLC and start playing the first episode on the DVD. Once the episode is playing click on the “Playback” drop down menu on the Finder and highlight “Title”. This will show you which Title (or file) is playing. So you should be able to see that episode one of Firefly is using Title 2. You can now pause the show and go back to Handbrake and on the main window flick on the “title” drop down and select “2”. From main window chose what you want to name the encoded episode (something like Firefly 1) and click the icon at the top of the window named “Add to Queue”. Go back and repeat these steps for each episode on the DVD. Once done you can click the “Start” button and Handbrake will encode each episode on the DVD.
CLOSE CAPTION SECTIONS (Subtitles) Updated: 3.10.2012
Sometimes you will be a movie or TV show that has sections where the actors are speaking a whole other language. When you are watching this on a normal DVD player the captions for what the actors are saying will show up automagicly. When you encode the same movie or episode with Handbrake these cations are not automagicly burned in.
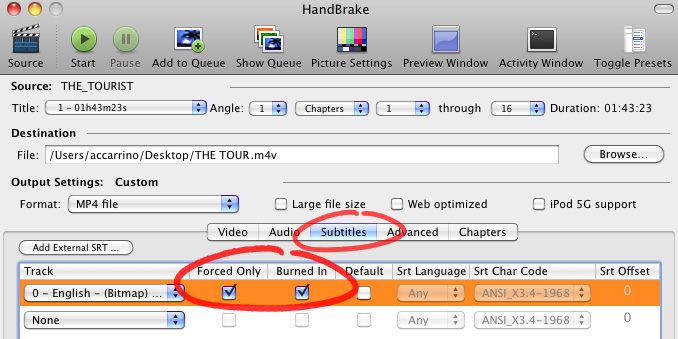
To have these captions or subtitles show up in the parts of the show they are supposed to click on the ‘Subtitles’ tab and then select ‘0-English’ underneath the ‘Track’. and burn your DVD as normal.
WHATS NEXT
With my new encoding settings setup I went forth and started to encode my DVD collection. In less than a month I had filled up the harddrive of my Mac Mini and was forced to stop encoding my movies. I had to order the Qnap NAS server before I could continue any more with this project.
In my up coming post “Mac Mini Media Center Project (part 3). I will be discussing the specs of the Qnap NAS server I ordered and how it’s been working out for me so far.