Addiction

sodaI admit it, I am and addict. My addiction, soda pop.

I love soda. I love how it tastes. I love how it makes me feel. As soon as I have finished one bottle, I am jonesing to open the next one.

Soda is my drug when I need a fix. It’s my cigaret when I need a break. It’s my coke when I need a hit. It is my one true addiction that I just can’t break. It is my vice.

I have read in the ‘4 Hour Body’ book that diet soda can prevent weight loss. That anything more than a can of diet soda a day will mess with your goal to loose weight and it is true. I have been tracking my weight daily since I started the Slow Carb diet and it’s clear that my recent plateau is a direct result of the diet soda I drink daily.

I have already started to ween myself off this insane addiction and it already feels like an uphill battle in the cold of night. With all the ingredients in diet soda like Aspartame, Phophoric Acid, Potassium Benzoate, Phenylketonurics, and Phenylalanine there is no way this is healthy for anyone on the planet. These two dollar words on the side of my diet soda bottle are probably the reason why I am addicted to it like heroin in the first place.

Green TeaTo get off this addictive nectar I am taking a couple of approaches. The first one is just a slow ween off. Everyday I am going to slowly reduce how much diet soda I drink till I am off or at least get down to 1 can of diet soda a day as recommended by the ‘4 Hour Body’ book. (The author of wich admits to be a huge addict of Diet Coke and states that reducing how much he drank was very difficult.) As I ween myself off of diet soda, I am going to supplement my caffeine needs with green tea. Green tea is great antioxidant and good for your metabolism.

As far as my weekly cheat day goes, I believe I am still going to drink a lot of soda. But on my cheat day I have always drank real sugar soda like Jones Sada, or Pepsi Throwback. The ingredients in these sodas are fewer and you can actually pronounce them unlike the ingredients in diet sodas.
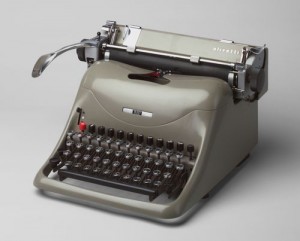
Writing A First Draft

When I sit down to write the first draft of a book, I like to create a document for each chapter. So in whatever wordprocessor you choose, start by creating a new document and save it as ‘Chapter 1’.  Then using the the outline you created earlier, copy the outline for chapter 1 and paste it into your new ‘Chapter 1’ document.

Lots of people have their own ideas and techniques on writing. I just like to write using the outline as my guide. The key word there being ‘guide’. While you are writing chapter 1 your thoughts and writing may go in a whole other direction. Some aspect of the story may grow out of your typing organically. That is perfectly fine and I encourage you to follow that flow. I find that a lot of my writing is till very organic and spawns lots of ideas. But by the end of it, I have touched on all of my outlined points. If something I have written was not a specified in my outlined point and it turns out to be really good I will add it to my outline should I ever need to reference the chapter I put it in.

Remember that your first draft should just be used to get your ideas out. To write the story. The first draft for me is more of a brain dump. Ernest Hemingway said “The first draft of anything is shit”, and that is how I treat it. Not until the second draft do I scrutinize over everything letter, word, and comma.

As far as words are concerned and how they should be used, I will not waste your time. The truth is that far greater writers than I have written wonderful books on how words should be used. I encourage you to seek out at least one of these books and read it before you start writing your first book. My personal favorit is ‘On Writing: 10th Anniversary Edition: A Memoir of the Craft’ by Steven King.


Creating An Outline

Before I ever start writing a book, one of the first things I do is write an outline. Having an outline makes writing a book so much easier. Having the roots of your story established so that when you write everything can grow and branch out.
When I write my outlines I do my best to keep everything simple and clear. It keeps you from suffering the derided blank page that seems to haunt many writers. It also ensures that you know where your story is going. It does this by making you think out all the major events that are going to take place before you start writing it.  Nothing is worse than getting halfway (or more) through writing a book, only to find yourself stuck not knowing what to do next.

Some people may argue that having a detailed outline of your book before you start writing takes away all the creative freedom one has from free from writing. My experience has found that to be a completely false statement. The way I write my outlines allows for plenty of room for one to be creative and come up with story ideas and events on a whim.

When I create an outline I date it with the date I started working on it. I will then title it ‘Outline’ with a subtitle of the book’s working title if I have one. I will than indicate the chapter followed by the month and year of when the even in the chapter is taking place. So for example:

Chapter # – (Month/Year)

  • Even number one
  • Event number two
  • Event number three

So If I took the template above and added actual content to it, it might look something like this:

Chapter 1 – (December/1980)

  • Birth of Joseph White at McCady Hospital
  • Joesph’s parents notice the new baby is not like other babies
  • Joesph’s parents struggle to keep their babies special abilities a secret from friends and family.

That is how I outline my books. Chapter 1 through however many till I am done.

Once my outline is done then I begin writing it all out. I do this by opening up a new blank page in my word processor application and copying my outline for chapter one and pasting it in that new blank page and use that outline as my guideline.

As you can see by my outline it leaves plenty open for the creative process to take over. My writing can take me off in many different tangents. Some are good and help the story along, while others do nothing but bloat out the story with needless details. I don’t normally worry about that during the first draft of my writings. I just let myself write and get it all out of my system. Its normally the second draft of my writing where I will go over everything line by line eliminating the needless tangents or the excess descriptions.

I found a really cool youtube video called ‘How To Write A 1000 Words‘ not to long ago. It’s was pretty neat for me to see a visual representation of how I pretty much write.

I hope you found this information useful. I am interested to read what you might do when creating an outline, or any writing tips for that matter. Please feel free to leave a comment and let me know.

More Framed Books

I recently got a great e-mail from Anthony James, who stumbled upon my ‘IKEA photo frames hack for comic books‘ post. In this e-mail he wrote:


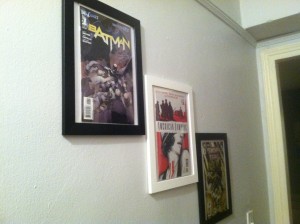
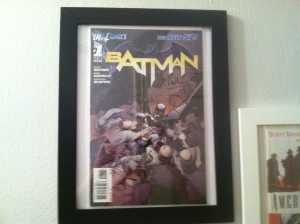
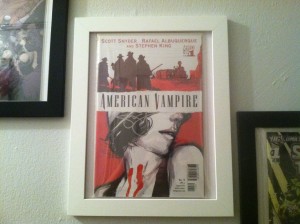
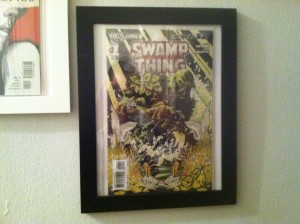
I recently had a chance to meet Scott Snyder at the Midtown Comics in lower Manhattan for the launch of Batman 1. I bought a copy of Batman as well as Swamp Thing and had him sign both. I also bought a copy of American Vampire 1 signed by Scott on Ebay.

After getting home I realized I didn’t want them all sitting in a long box in the closet so I looked up framing solutions online. They had to look nice in order to get my girlfriend to approve hanging them in the hallway, so at first all I searched was Amazon. After giving up because I needed 3 frames which would be very costly, I searched Google and came across your site.

We went to Ikea in Brooklyn (just a short 15 minute drive so I can do this all the time!) and I picked up the frames. One thing your site doesn’t mention is that the store has different colors so I went with a white frame for American Vampire as it’s primarily a white cover. They have other colors as well but the black was the best fit for Batman and Swamp Thing.

One thing I did different was I used white card stock behind the comics to make them almost appear like they are floating. I also used foam mounting tape on the edges of the frame which keeps the flush with the wall. The comics don’t pinch at all in the frames which is great.

Again, thanks for the awesome tip. It saved a lot of money and left me with a nice exhibition in my hallway!

Thanks for writing and sharing your photos Anthony!

Create A Cheat Sheet

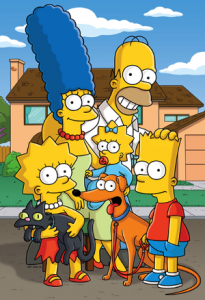
The Simpsons Family Picture

Before I ever start writing a book there are a couple of things I do that help me with my writing process. One thing I do is create a ‘Cheat Sheet’ of characters I am going to use in my book.

My ‘Cheat Sheet’ helps me keep track of people, there names, there personalities, there ages, and anything else I might need for future reference. A character I keep on a cheat sheet rarely takes up more than one line on text. So the whole thing is clean and simple and is an easy to use reference.

So here is an example of a cheat sheet I would create using characters from the Simpsons. It contains the important information I might need to know about a character in one line of text.

Bart Simpson • 10 (Dennis The Menace) Trouble maker – Fat – Prank Caller
Homer Simpson • 36 (Ralph Kramden) Loud – Get Rich Quick ideas – Lazy
Lisa Simpson • 8 (Marcie from Charlie Brown) Smart – Voice of reason – Musical

So the idea behind it is pretty simple and generally includes.

  • Character Name
  • Age
  • Who they remind me of
  • Personality traits to remember

This is actually the template I use when creating a cheat sheet.

Character Name • Age (who they remind me of) Traits – Personality – Quarks

Thats how I do it. My cheat sheet has been such a valuable tool for me when writing. It makes the whole process of writing so much easier. I really hope anyone getting into writing will find this tip useful. Let me know if you have any tips on how you track characters. I am always interested to learn how others write.